 This mason jar lasagna is not a food storage or canning recipe. It uses mason jars for meal prep convenience, NOT long term storage. This is like my mason jar salad recipe, something easy to make ahead of time that you can eat in a hurry or at work.
Secondly, this is not a recipe. It is a technique. Neither this article, nor the attached video will show you how to make lasagna. If your ready to start experimenting with cooking in jars and such you should already have a favorite lasagna recipe. (if not here is a simple lasagna recipe from simply recipes.)
Like all lasagna recipes, start assembling by pouring a spoonful or two of sauce on the bottom of your jar to prevent the pasta noodles from burning and sticking.
Then use a ring from one of your jars to but 4 circles of noodle per jar of lasagna.
Assemble your lasagna recipe from the bottom up. Sauce, noodle circle, mix, cheese, noodle…. You get the point.
Make sure to leave some space between the top of your pasta and the rim of the jar. The lasagna will bubble and you don’t want any food to reach the lid while it is baking.
Safety
Even though this mason jar lasagna is not a canning recipe, follow all canning safety precautions.
Ensure all your jars, rings, and lids are clean and sterile before you start.
Whip the rims clean of food after assembling your pasta.
Tighten ring firmly on the jar and then back off just a bit to allow expansion.
Once you have finished, bake the jars at 350 °F for 35-45 minutes depending on size of jars and your preference.
To eat, simply remove the metal ring and lid and microwave for a minute or two.
Method #1
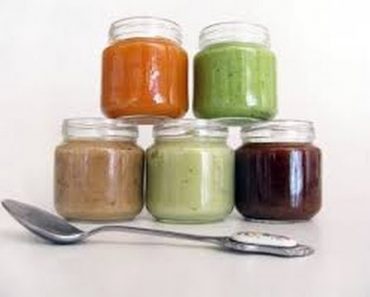
This is a simple way of making your own Baby Food.
We are only using rice, water, and either breast milk or formula depending on your preference.
I like this because it makes baby food for our boy without all the weird chemicals in commercial baby cereal.
By doing this we control exactly what WT eats.
Additionally, I know that I can make him food that he can eat even if he is not old enough to go on the rice and beans disaster diet.
This is a pretty easy recipe to make.
While learning how to make baby food we learned lots of other recipes and ways of doing things.
Ingredients
- Rice
- Water
- Formula/Breast Milk
Procedure
- Cook Rice
- Blend to a paste
- Add enough milk or formula to get to the consistency you feed your child.
Could not be easier.
Something else you can do with this is portion it into ice cube trays to store in freezer for 6 months or so (as long as you would keep frozen Breast milk)
This allows us to mix it with warm formula to feed the baby without a lot of trouble (not that making baby cereal is trouble)
At the age he is eating baby cereal the new hasn’t wore off…. LOL
Method #2
The way we are showing today is the easiest, and closest to the commercial cereal you buy in boxes at the store.
However you do have to grind the rice to make a flour.
Making our own baby food allows us to control exactly what goes into Williams body.
As parents, we want to ensure that he only gets the foods he needs without a lot of chemicals and sugars.
As parents we want him to have everything he needs to grow up strong, smart, and adaptable – and at this age the best thing we can do is to feed him well and give him lots of attention.
Ingredients
1/2 cup short grain brown rice (i like to use organic brown rice)
Preparation
- Place the brown rice in a spice grinder or blender for 45 seconds-1 minute or until finely ground.
- At this point you can store the rice powder in a sealed container in the refrigerator or in a cool dark place.
- To make 1 serving for a 4-6 month old baby
- Bring 1/2 cup of water to a boil and sprinkle in 2 tbsp of the ground brown rice.
- Whisk continuously for 30 seconds and then occasionally for 4-5 minutes or until the mixture is thick and creamy to prevent any lumps from forming.
Serve as is or with fruit or other additions as desired or recommended by your pediatrician
William (he calls himself TNTell the YouTuber) came to me while I was working on my website and was so excited that he made his own chocolate milk without asking for help (he says he can do that because he is 6). He said he wanted to make a video on how to make chocolate milk.
I thought it was funny as he had chocolate all over his face and the timing was suspicious as his mother had just left for the gym.
He said it was okay because he was practicing to make a video for his channel. You ought to check it out.
With that logic I guess we had to go ahead and make a video.
I think that it wasn’t all about the chocolate, I have been kinda busy working on the site, and I think he wanted some Dad time. He asked on Monday if we could have a father son dinner (but he allowed his mom to come).
His timing turned out to be perfect, he had it made and the mess cleaned up right when his mom got home.
She took one look at his mouth and reminded him she told him he couldn’t eat anything while she was gone. Luckily he pointed out that drinking was not eating.
I am in so much trouble. I am creating a free thinking trouble magnet. After all, that was my plan from the day he was born.
One common item that you will find in every kitchen is at least one knife. There are different kinds of knives in cutlery sets, and each particular knife has a different function altogether. Popular kitchen knives being boning knife, bread knife, chef’s knife, but there are other specialty kinds also.
Similarly, you will find different pocket knives as well that can easily fit in your pocket and have more than one blade. Some of the best pocket knives include Tac Force TF-705S assisted opening and Case Mother of Pearl Mini Copperlock. Though there are different knives available for different purposes. Most safety tips for all types of knives are the same. A person needs to have some proper training in order to ensure that there is no risk of injuries while using a knife.
Below are some of the best kitchen knife safety tips so that the use of knives becomes completely safe and you are able to use a knife just like a pro chef.
A Sharp Knife is the Best Knife
You may not believe it but most of the injuries that occur while using a knife is when you are using a dull knife. Thus it is always advised that one should use a sharp knife for whatever purpose the knife is being used. Whether it’s a kitchen knife or a survival knife, a sharp knife is the best one.
When you are using a dull knife, you tend to apply more force so that you are able to cut properly. In doing so, there are chances that the knife may slip and increase the likelihood of an injury. It is advised that a knife sharpener should be used in order to maintain the original knife blade.
Use Different Knives for Different Jobs
Not all knives are the same and not all tasks that you do with a knife area same. For a different purpose, there are different types of knives available. Hence selecting the correct knife for a particular job is important. This reduces the chances of any injury and the job can be well executed.
For example, you cannot use a bread knife if you want to cut a large piece of meat. This task requires a butcher knife for that purpose and vice-versa.
Always Use a Chopping Board
One of the most common mistakes that people do while using a knife is to cut any food or fruit in their hands. There is a high risk involved in it if you are doing so. It is highly advised that no one should cut anything in their hands with a knife. A proper cutting board should be used where all the food and fruits should be cut.
Cutting anything in your hands can increase the risk of injury. This is especially true if you are using a dull knife. Also one should use a large cutting board so that more space is available.
Proper Storage of Knives
Knives can be dangerous if you leave them around like anything. And if you have children in your house or surroundings, then this should be the last thing that you should be doing. Knives should be kept in a proper designated space so that it becomes easier to use when you need them.
Putting them in a drawer with other cutlery items can be extremely dangerous and should be avoided at any cost. A good knife holder that can hold different types of knives should be used so that accessing them becomes easier. These knife holders also protect your knives from contaminants and increase the age of your knives as well.
Frequent Cleaning of Knives
In order to protect your knives from any contaminants, one should always clean the knives thoroughly rather than leaving them on the cutting board or in the sink. Once the knives are washed, they should be stored properly in the designated space and should not be left around anywhere else.
Also, knives should be washed and cleaned separately from the other cutlery items that are washed. The main reason is to protect the edges of the knife that can be hampered if you are washing it with other cutlery items.
There are some of the tips that can help you to use knives like a pro irrespective of the use. Knives can be really dangerous and using it carefully can help reduce the risk of injuries.


